GP Portal gives internal users the ability to import an unlimited amount of records at once via an import template. The steps below walk users through how to successfully import a new file.
Step 1: Access CRM
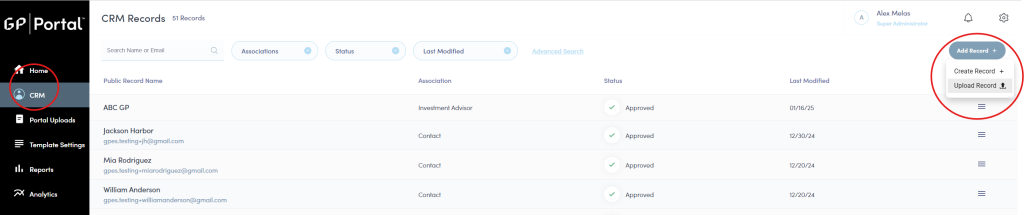
- Navigate to your portal and select CRM in the left navigation menu.
- Click on the Add Record button.
- Select the Upload Record option.
Step 2: Upload Data File
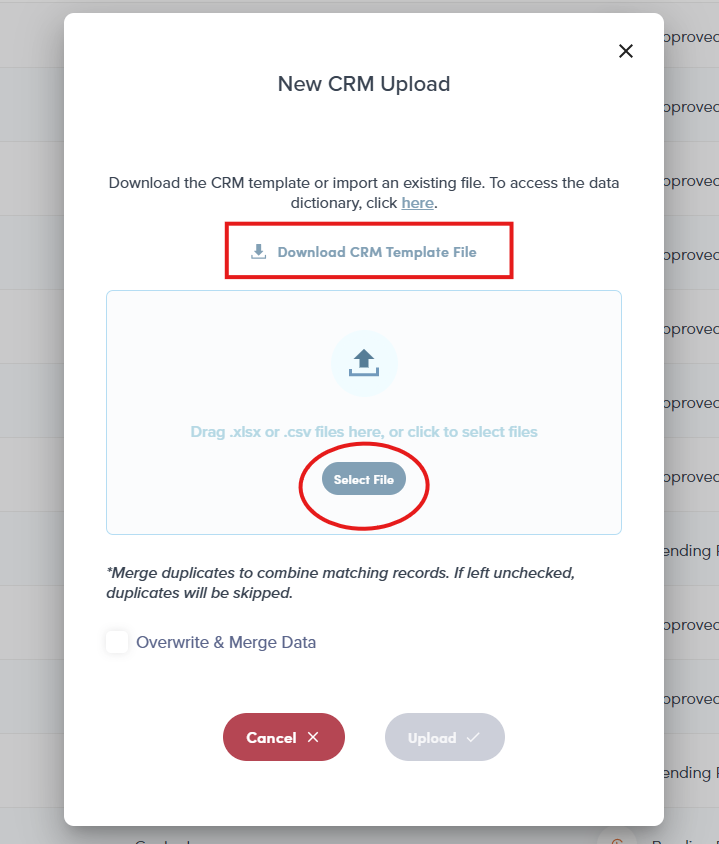
- If you do need to download a template to populate, click the Download CRM Template File.
- Follow the instructions at the bottom of this article to ensure your template is populated correctly.
- Click Select File to upload your completed template. If you don’t yet have a template, download one in the next step. (The file must be .xlsx or .csv)
- You can view the CRM data dictionary here.
Step 3: Confirming Upload
- After upload, the file automatically begins background processing. You will receive an email indicating whether your upload was successful or failed:
- If successful: Your email will confirm the upload and include a link to view records.
- If unsuccessful: Your email will include details on errors and a link to the error report.
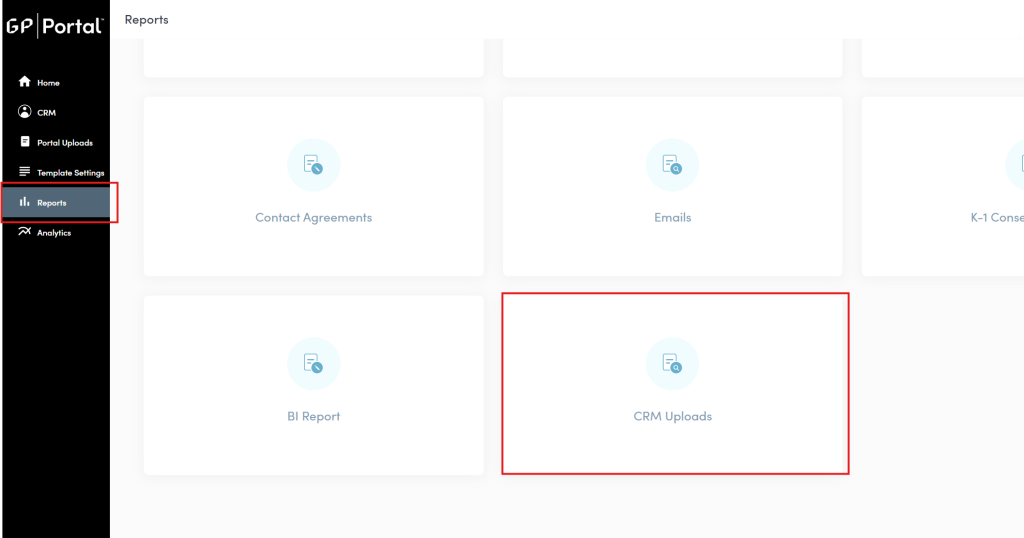
- Inside the Reports tab, navigate to the CRM Upload reports.
- You will see this upload in the pending state.
Step 4: Reviewing Upload Logs
- Go to the Reports tab.
- Click CRM Upload.
- Find your recent upload to check status (successful or failed).
Step 5: Viewing Summary (Successful Uploads)
To view a report that has finished successfully:
- Select a successful upload from the logs.
- Click the hamburger button.
- Choose View Summary.
- The summary displays:
- Record types processed;
- Counts of new records, updated records, and skipped records.

Step 6: Viewing Errors (Failed Uploads)
If your upload failed:
- Click the hamburger button to the right of your upload row.
- Select View Errors.
- Use the error report to identify and correct all issues before re-uploading.
- Type: Error type.
- Description: Why this is an error.
- Locations: The row number.
- Worksheet: The tab in which the error occurred.
- After correcting the errors, re-upload the file.
- Continue correcting and re-uploading until the file processes without any errors.

How to Populate Template (From Scratch)
When first uploading this template, be sure to follow these rules:
- Fields with green headers are required and must be completed. Fields with blue headers are optional and may be left blank unless otherwise noted.
- *The only exception to this is the Last Name field, which can be left blank if the record is a Company versus an Individual.
- Sheet 1: Investment Advisor:
- Investment Advisor Name: The name of the investment advisor or management firm. In most cases, this is a 1:1 match with the client name.
- Sheet 2: Investing Entity:
- Fund Code: A unique alphanumeric code to identify the fund (e.g., IEF1). This code must match exactly across all tabs.
- Investing Entity Name: The full name of the fund.
- Investment Advisor Name: Must match entry on tab 1.
- Entity Type (Closed/Open/Hybrid): What type of fund it is:
- Closed: Fixed-term vehicle where investors commit capital, which is drawn and returned over the fund’s life.
- Open: Investment vehicle that continuously offers new shares and allows existing investors to redeem shares at the fund’s net asset value on a periodic basis.
- Hybrid: Combines elements of both, offering long-term capital with limited redemption windows.
- Commencement Date: The start date of the fund.
- Sheet 3: Investor:
- Fund Code: The code of the fund the investor is participating in (must match an entry in Sheet 2).
- Investor Code: A unique alphanumeric code of your choosing to identify this specific investor–fund relationship. A common convention is to combine the fund code with a sequence (e.g., IEF1001).
- External ID: This will be the system’s unique alphanumeric identifier for this investor. Use any convention you like (e.g. ID001, ID002, etc.).
- Note: If you have the same investor listed more than once on the template (e.g. they participate in multiple funds), be sure the external ID matches across their rows. If the same investor is added more than once with different external IDs, the system will create duplicate investor records.
- External ID Name: The source of the external ID. When populating manually, feel free to use any name you wish (e.g. SysID).
- First Name: The investor’s first name, or business name if a company.
- Last Name: The investor’s last name. This may be left blank if the record is a company.
- Individual/Company: Select whether the record is an Individual or a Company.
- Sheet 4: Communication (Contacts):
- Investor Code: The unique code from Sheet 3 that this contact is associated with (e.g., IEF1001). There can be many contacts to one investor code. Investors can also be their own contacts.
- First Name: The contact’s first name, or business name if a company.
- Last Name: The contact’s last name. This may be left blank if the record is a company.
- Email: Contact’s email address. This will be used for login and notifications. Each investor/contact pair requires a unique email address.
- For example, if one contact is a contact for more than one investor, they could use the same email as long as they’re linked to different investor codes.
- Individual/Company: Only these options may be selected.
- Folder Access: Indicate “yes” if this folder should be viewable to this contact. Indicate “no” to prevent the contact from viewing this folder.
- Only the portal’s default folders are listed in the template. New folders can be created by portal admin and preparers, and their permissions can be assigned after being added.
More information can be found in the CRM Import Data Dictionary.